March 20, 2012
Miles, Chris, J hiltz, J MacLean, Rick, Brian, Mike, Peter, Paul
Leo discussed the layout for turning the spindles, i.e the drawing that should be used to make a series of identical turnings.
Leo discussed the layout for turning the spindles, i.e the drawing that should be used to make a series of identical turnings.
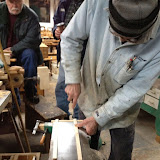
He then turned to the morticing machine and demonstrated how to set the morticer up and align the wood, how to insert the bit and how to prevent splitting of the chisel.
He then showed us the technique of hand embellishing the legs by using a hook knife made from a file and a steady rest on the lathe to carve out flutes. An indexing system is needed for the lathe so as to get evenly spaced flutes.
Interlude: He showed us how to use dovetail glue joints to make a strong frame from thin stock. The drill press is used to drill out half circles on the ends of the joints and the holes filled with a spline and epoxy.
Using a router to make flutes leaves burn marks at the ends of the flutes. Use a dark stain to fill the flute and contrast with the rest of the leg. Salad bowl Finish is sprayed on the leg first ( 2 coats and into the groove). Then the dark stain is applied into the flute using a felt brush. Wipe off the edges of the grooves with a cloth.
(Buy a ladies felt hat at Value Village and cut it up!)
Hint: Heating the salad bowl finish and the wood is a good way to get the finish to take quickly and prevent running.

