Showing posts with label minutes. Show all posts

Tuesday, April 3, 2012

Most recent meeting minutes:

Paul, Lawrence,Rick, Peter, Mike, Miles,  J Maclean, Chris
Leo has perfected the salad bowl finish container and he showed how it works. We will all do one. We need to turn a top to approximately a diameter of 3 5/8 and height of 2 inches. (Make it a little oversized first.) We need one liter IV bags. The bags can be heated a little and they will stretch to fit this top diameter. (3 5/8). The seal will be done with concrete bond and white cement.
The top should be made by glueing up layers of hardwood. Don’t use plywood.

Leo went over several tips on accurate thickness planer use.
1 Lift the wood as it enters the infeed and again lift the exiting end as it leaves
2 The rollers should be accurately adjusted to be just a hair above the platform so as to grab the wood that enters and leaves
3 Run wood in at an angle to minimize snipe 
4 Use a planing board to plane thin pieces. Make it as wide as the thicknesser will accept and snip off the ends at an angle. Make the board exactly one inch thick ( end stop included) so that the guage on the thicknesser can be used.
Tenons:
Can use a dado on the saw or a tenon jig and fence.
Be accurate.
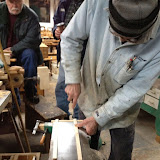
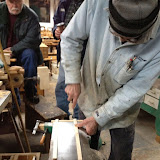
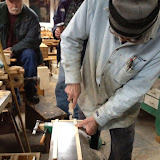
Use the jig shown in the photos to hand plane a tenon.
For a 3/4 board with a 5/16 tenon, the jig should be made with 17/32 size guides and add a strip of paper under the guides to get an accurate tenon. See photos.
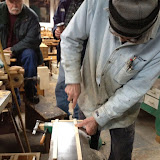
A rabbet plane is uses to plane the tenons. 

Table project

Tuesday, March 20, 2012


March 20, 2012

Miles, Chris, J hiltz, J MacLean, Rick, Brian, Mike, Peter, Paul


Leo discussed the layout for turning the spindles, i.e the drawing  that should be used to make a series of identical turnings.
He then turned to the morticing machine and demonstrated how to set the morticer up and align the wood, how to insert the bit and how to prevent splitting of the chisel.
He then showed us the technique of hand embellishing the legs by using a hook knife made from a file and a steady rest on the lathe to carve out flutes. An indexing system is needed for the lathe so as to get evenly spaced flutes.
Interlude: He showed us how to use dovetail glue joints to make a strong frame from thin stock. The drill press is used to drill out half circles on the ends of the joints and the holes filled with a spline and epoxy.
Using a router to make flutes leaves burn marks at the ends of the flutes. Use a dark stain to fill the flute and contrast with the rest of the leg. Salad bowl Finish is sprayed on the leg first ( 2 coats and into the groove). Then the dark stain is applied into the flute using a felt brush. Wipe off the edges of the grooves with a cloth.
(Buy a ladies felt hat at Value Village and cut it up!)
Hint:  Heating the salad bowl finish and the wood is a good way to get the finish to take quickly and prevent running.
Leo says to go slowly with the table. We will use hide glue for the joints!


Table project

Tuesday, March 6, 2012

Table continued

Peter, Mike, J MacLean, J Hiltz, Chris, Paul, Brian Harpell, Rick

 Leo says:  use a sharp marking knife to scribe lines eg on the legs to mark off the pommel length (the top square part of the legs) : bring the scribed line around all four sides. Then place masking tape along the edge of the line. This can help prevent split out when cutting the tapers. Use a sharp skew to cut the pommel edges and bring the blade of the skew in perpendicular to the cut if you want a square cut finish. Leo went through the marking method to mark off where the mortices will be cut.


 See photos.

 For next session have all four legs ready for marking and drilling mortices. Leo showed how to properly sharpen a carpenters pencil.
Table project

Tuesday, January 31, 2012

Table continued

Wayne, Peter, Mike, Rick, J MacLean, Miles, Paul, Lawrence

Leo discussed glueing up panels.Once stock is planed, stand the pieces on edge and clamp together with spacers for a week so that air can circulate and let them accomodate to the humidity equally and prevent a warp.

Once glued up, routing grooves on the underside invisible surface can prevent warp. (Don’t rout right out to the end of the panel however as then the groove will be visible on edge.
If you intend to profile the edges, leave enough width so that you can rout the end grain edge
( which results in tear out) and then rout the panel to final width and routh the other edges (with the grain).

Once the top panel is done and the legs profiled, next is to cut the aprons to fit the assembly. Apron ~4 1/2 inches wide. This allows 1 1/2 inchs top and bottom for the drawer to fit.
The tops of the legs are spaced differently from the sides and fonrt/back of the panel.
The distance on top is 3/4
Side is 1 1/4
See the photos attached to this posting for a better idea of what this means.

Leo discussed planes and plane blade angles of attack, cap iron sharpness.
The primus plane is the best for flattening a top. The blade is adjusted by tapping the plane. The ones with the knob on end to advance the blade are more tedious to operate.
He then discussed scrapers and how to use and sharpen them.
Remember to take the sharp corners off the cutting edge.
Hint: Don’t use diamond stones to sharpen ferrous metal blades.
It wears awary the diamonds.
Table project

Tuesday, January 17, 2012

Meeting

Jim Hiltz, Jim MacNeil, Peter, Mike, Chris, Miles,Wayne, Paul

We began work on the table project.

Step 1 Sketch a design
Eg top 18x16,, drawer, leg shape

Step 2 Material list

Choose stock for top: 6-8% moisture content is best

Leo chose a large board of cherry and cut it into 18 inch pieces--three for the top
Flatten one side on the jointer, choosing grain direction to minimize tear out
Flatten the second side on the thickness planer again being careful with grain direction

Leo demonstrated a jig to use the jointer as a thicknesser..see photos:

When one side is flattened, run the board along the table saw to make a cut along the top and bottom edges; there will be a rough section left in the center; run the board along the sled jig to remove this section until that side is flat and it should be parrallel with the opposite face now.


Next joint the edges of the boards.
Place the first board “marked side” in to the fence and the next board “marked side” out so that any discrepency in the jointer fence is cancelled out as the boards meet.

When boards are planed, align them with the end grain patterns alternating up and down if possible but the main thing is to get the top surface matching for pattern and grain direction.
Line them up and draw a reference mark along the top so that they can be reassembled correctly.

Glue up the panel , making sure the edges are flat and the joints flush.
Pinch together one end of the panel with a clamp. If the opposite end separates, the joints are not good.
Leo demonstrated his new jig for bowl turning.
He went over carbide blades, describing microcrystalline manufacturing.

Leo described how a thickneser works.
There are rollers that drag the wood through and the cutter rotates on top of the board.
The rollers tend to tip the board as it enters and leaves, leaving snipe at both ends.
The best machines have four rollers..two at each end so that the board is kept level as it rides along two rollers on entry and again on exit. Click the picture below to see a sketch of what this means!
From Table project

We need to make the panel and turn four legs by next session.
Table project

Tuesday, March 15, 2011

Minutes-March 15/11

Most recent meeting minutes:


March 15,2011

Paul, Peter Stanford, Mike MacLean, Wayne, Wilson, Rick, Naq, Mathew, Miles,
Lawrence, Robert, Chris, Frank Chaison

Leo discussed Lacquer.
The origin of lacquer is from the Rhus tree, whhich grows in Japan and China. The sap of the wood is the essence of lacquer.It is poisonous. Sumac is a local tree that is in the same family.

Natural lacquer is durable. It needs moisture to cure.
Leo told the story of a shipwreck that was discovered in an Archipelago around Japan/China. The ship had a cargo of Lacquerware (paper that was coated numerous time with lacquer until it was hard) andd when it was raised the items were in pristine condition even after 500 years in salt water!

France discovered that bugs that ate the Rhus tree were full of lacquer and it could be crushed out of them.
Alcohol was used as a solvent for it.
The French used red wine for this!

White shellac can be mixed with fillers such as soot, Tempera to form a colored finish.
It dries fast and if one adds a second coat, it will dissolve the first coat so one works quickly.

Modern lacquer is made from Nitrocelluloids with other additives to make it flexible (since wood is constantly moving).

Mix white shellac with any Tempra colors.
Shellac flakes dissolve in alcohol or methyl hydrate.
Orange shellac is the better quality.

Fillers such as limestone (CaCO3), Portland cement,Mesussa cemeent, and whiting can be used with Masonary bond to form excellent pore fillers for open grain woods.

Gorilla glue has to be applied to wet wood.
It has a short shelf life.

Leo asked that everyone do a candle vase template for the next session.
This was described in previous minutes.

Leo and Robert went over the method for enlarging an irregulat sketch using a compass and bevel to transfer measurements.

Transfering Drawings and Ecceentric turning and sanding

Tuesday, December 7, 2010

Meeting December 7, 2010 (Pearl Harbor Day!)

Paul, J Hiltz, Mathew, Wayne, Chris, Naq, Miles

(Click on the title to go to a page on Pearl Harbour Images)

Leo discussed how to sharpen a scraper.

Tilt the table of the grinder slightly uphill and grind off the scraper until sparks are coming over the top at all points. Do the same for the other side ( and ends if needed) of the scraper.

Naq asked Leo to discuss carbide tool bits and Leo went over the benefits and handicaps of them. One needs a fine diamond plate to sharpen them..very expensive. They stay sharp a long time however.

Paul brought in some small turnings finished with CA glue.
Also he brought in a few pieces of old ebony found in a shipwreck, which Mr Hiltz had discovered and given to Paul.

Leo did some demonstration of how to use the skew and parting tools properly.

Paul asked Wayne to name the huge iron tool that sat in the metal lathe room but Wayne failed the test.(Swage block)

Scroll down to the links section to go to a site of photos of swage blocks