Showing posts with label gold. Show all posts

Tuesday, December 5, 2017

Shellac flakes, Gold leaf, Staining Cherry

Keenan, Arno, Jim MacNeil, Jim Hiltz, Rick, Paul, John

Leo set up an old Craftex lathe that Miles had sent over and started to explain to the new members the principals of lathe work.

Arno wants to have Leo take them through the bowl process starting from scratch--ie the raw wood blank from the tree.

Paul worked on the Gold leaf vase. Jim Macneil helped out with that.

Jim Hiltz brought in a finished bowl, ready for staining and finishing.

Leo discussed finishing Cherry.
It is very hard to stain as the end grain absorbs too much stain. Best approach is;

Finish sand to 800-1000 or higher
Spray on Shellac.  Shellac is food safe. It is a biological product gathered from a certain tree species. Insects produce the shellac.
Let that dry
Wipe on the stain . Mix the stain first with household ammonia. This makes the stain adhere; otherwise it would not .

Then let that dry and repeat the cycle a few times. This results in even staining. The more coats the darker the cherry will become.

Shellac is best made using flakes; blond or super blond best. (Available from Wood Essence-Canada)
Use one measure of flakes to 4 measures of Methanol.

Keep flakes in a dry place as they absorb moisture and get spoiled .

We discussed having a separate meeting with the new members over the Holidays to discuss plans for the upcoming workshops.

NOTE

Leo discussed Shellac. He is studying modifications on the use of the age old finish.
Shellac comes from the secretions of insects;

Lac is the scarlet resinous secretion of a number of species of lac insects, of which the most commonly cultivated species is Kerria lacca.
Cultivation begins when a farmer gets a stick (broodlac) that contains eggs ready to hatch and ties it to the tree to be infested.[1] Thousands of lac insects colonize the branches of the host trees and secrete the resinous pigment. The coated branches of the host trees are cut and harvested as sticklac.
The harvested sticklac is crushed and sieved to remove impurities. The sieved material is then repeatedly washed to remove insect parts and other soluble material. The resulting product is known as seedlac. The prefix seed refers to its pellet shape. Seedlac which still contains 3-5% impurities is processed into shellac by heat treatment or solvent extraction.
The leading producer of Lac is Jharkhand, followed by the ChhattisgarhWest Bengal, and Maharashtra states of India. Lac production is also found in BangladeshMyanmarThailandLaosVietnam, parts of China, and Mexico.

Shellac flakes can be dissolved in Methyl alcohol
They come in various colors: Orange, white, blond, and ultra blond: 
(Available at Wood Essence in Ontario) The flakes will deteriorate unless humidity is low.
Orange is the hardest to use as it colors up the grain too much
Use a ratio of:   1Flakes : 4 Methyl alcohol
This solution should be stable for a good while
This dilution is OK for spraying  use a low pressure or it will gum up on the surface of your wood.
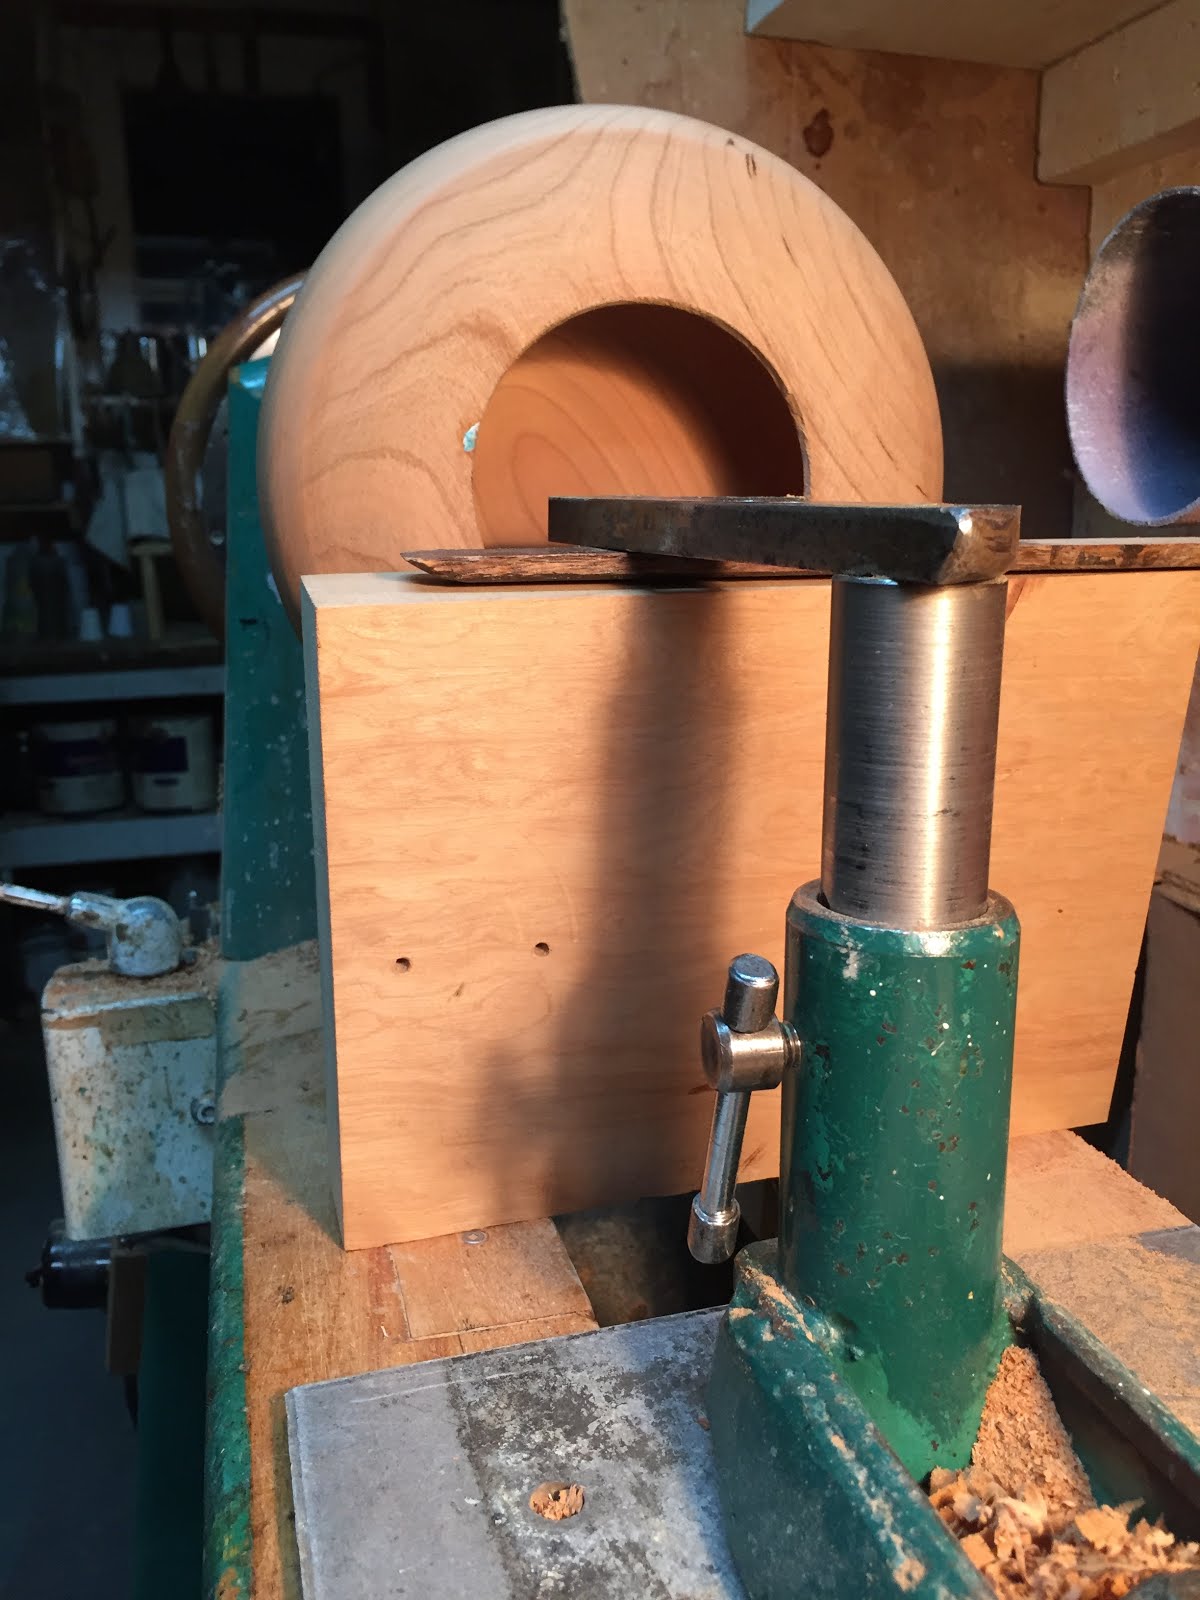
Jig for getting into the bowl to turn
Note the plate on lathe bed, the wood rest on which the metal arm sits

The L-shaped rest is sturdy  3/8 to 1/2 inch metal plate


Craftex Lathe ..beginners instructions

Tuesday, November 21, 2017

Keenan, J Hiltz, J Maclean, Rick, John, Shawn, Arno, Paul, Miles

Leo started by demonstrating how a plane blade cuts wood, emphasizing the angle of attack of the blade. In turning the inside of bowls, raising the tool rest can alter this angle so as to make it easier to remove material.

When one sands off the bowl, more wood comes off the end grain than from the side grain as the bowl turns. Hence the wood turns oval as sanding progresses. Using "stones" to grind down the wood ( inside and out) works well to minimize this problem. A broken piece from an angle grinding wheel works well. The cutter can be scored on a grinding wheel and broken into pieces.

Using various grit  and shaped sharpening stones works well.

Leo demonstrated how to apply gold leaf on Paul's vase. Size is applied, let dry until just a little sticky to touch and then apply the leaf. Use wax paper to pick up the leaf..makes handling it easier.  Squish it into the grooves  with a dry brush.. 2500 sand paper wet with paint solvent is used to sand off the leaf from the overlap and edges.

Photos Below: specialized toolset to get inside the bowl: various stone cutters for truing the bowl  A Piece of a grinder disk


an assortment of stonesHome made holders for the grinder wheel pieces
Trueing with stone

Trueing with finer stone
A box of small stones, various grits


Supplies needed:
 Gesso, made from the following ingredients:
 Yellow ochre pigment: Whiting (sifted limestone)
(Not much yellow is needed)
 Fish glue
 Good brushes
 Gold leaf
 Transfer paper for real gold leaf
 Eraser (rubber)
 Paper towel
Paint the vase: brush it on well: spend a long time at this and do several coats
Sand between coats using paint thinner on the sand paper: start at 320
Spray on lacquer
Cut out the grooves again to expose the wood
Brush on concrete bond: let dry
Brush on the yellow pigment:whiting , mixing it with bond: this gives a very hard surface
Sand out the groove and recoat
Then brush on fish glue (or sizing)
Let it dry
The gold leaf is brushed lightly with water and laid in the groove.
The water melts the fish glue!
Apply the goldleaf gingerly and press it down using a rubber
Let it dry
Can do a second layer

Then burnish with agate

Tuesday, March 22, 2016

Bowl Woes

Rick and Paul were the only attendees
Regrets: Mr. Caldwell, Mr. Martel

Some discussion on whether we should suspend membership for Misters  Hiltz and MacLean and Miles MacDonald. We finally agreed on giving them a second chance to redeem themselves but if they don't show for next meeting ,woe betide them!

Rick continues work on a big bowl using the bowl lathe. Leo adjusted the rollers-trued   them up
Leo has completed a lovely, stylistic, tall vase using a silver inlay (aluminum actually)
(Photos available later)


Paul brought a small vase that was gold painted which Leo liked
Paul had a large bowl that had lots of epoxy fill and uses a sharp scraper to clean up the outside  and remove the epoxy. Since the bowl was laying around the shape altered a little and a 3-jaw chuck will be needed to mount it for turning the inside. The outside is all finished

Leo Advised spraying on a good shellac coat BEFORE filing in with epoxy

Robert is working on making his own musical instrument using discarded hard drives, fiddle strings   and sundry other parts...very mysterious but he seems to think it will work.

Paul's Gold painted piece
Paul's vase: Black acrylic paint/whiting  mix; overpainted with a gold sparkle and then shellac

Tuesday, March 10, 2015

Tapered post

Rick, Chris, Jimmy MacLean, Miles, Paul

Paul had a dead blow hammer with a loose fitting of the handle.
To fix a hammer with a loose head, remove the handle, drill a few small holes in the wood of the part of the handle that fits inside the business end, apply Chair Doctor glue, which swells the wood, and drive the handle back in place.


Paul had a hexagonal tapered post for a hall tree (for hanging clothing) and needed to find the center of the top of the post so as to install the finial.

Leo demonstrated a way to line the post up and get the center and then use a square block with a predrilled hole lined up with the top of the post to drill down through the post.

Leo went through the process of Gold leafing again.

Gesso has to be applied in many layers followed by bole and then ochre and once dry, the surface is wet and the gold applied with a guilders brush and burnished in.

In former days mercury was used by guilders to handle gold. As well hatters used it.
Since it was poison, these trades had a short life expectancy.
Hence "Mad as a Hatter"

Sheetrock, the plaster used in drywalling, is very hard once dry.

In measuring substances for mixtures eg epoxies, tilting the container  sideways until the fluid level is at the bottom of one end and top of the other end gives you exactly half the volume.

Botttle tilted until fluid level is like in the picture.