Showing posts with label definitions. Show all posts

Sunday, February 15, 2015

Definitions:

Bole- a smooth clay/water mixture: applied i n layers over a surface in preparation for gold leafing. Use this past mixture and mix it with Rabbit skin glue to get the best surface for gold leafing.

Whiting-Limestone (calcium carbonate) : mix with fish or hide glue and apply several layers to surface to create a hard sooth surface; sand between each application

Medussa cement can be used in stead of limestone

Gesso-a hard compound of plaster of Paris or whiting in glue(Rabbit)  used in sculpture or as a base for gilding or painting on wood.

Guilders brush-picks up gold leaf by static electricity

Target acrylic--a water based acrylic lacquer: excellent to spray on.
(Cover the nozzle of the spray gun with a plastic cap foam filled and dampened to prevent the nozzle from hardening over.)

Ochre-a coloured clay to make Bole

Agate-stone used to smooth on the gold leaf

Fibonacci numbers or Fibonacci sequence are the numbers in the following integer sequence:
1,\;1,\;2,\;3,\;5,\;8,\;13,\;21,\;34,\;55,\;89,\;144,\; \ldots\;
or (often, in modern usage):
0,\;1,\;1,\;2,\;3,\;5,\;8,\;13,\;21,\;34,\;55,\;89,\;144,\; \ldots\;.
Link

By definition, the first two numbers in the Fibonacci sequence are either 1 and 1, or 0 and 1, depending on the chosen starting point of the sequence, and each subsequent number is the sum of the previous two.
Golden Ratio
In mathematics, two quantities are in the golden ratio if their ratio is the same as the ratio of their sum to the larger of the two quantities. Expressed algebraically, for quantities a and b with a > b > 0,
 \frac{a+b}{a} = \frac{a}{b} \ \stackrel{\text{def}}{=}\ \varphi,
where the Greek letter phi (\varphi or \phi) represents the golden ratio. Its value is:
\varphi = \frac{1+\sqrt{5}}{2} = 1.6180339887\ldots.

Tuesday, May 1, 2012


Paul, Lawrence, Rick, J MacLean, Peter, Mike, J Hiltz, Chris

(Mr. Hiltz was conspicuously quiet this evening; Leo was vigorous)
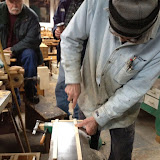
Reviewed the table assembly. Leo has his table completed. (See photos)
The drawer opening should be cut neatly and the end section finished with a file, using a jig in the vice to keep it neat and flat.
Reviewed dustcovers , which are panels that go between each layer of drawers.
The back end piece of the drawer is usually lower to avoid striking and to allow air flow so that the unit opens and closes smoothly. The drawer should close with the sound of a bank vault door.

(Leo surmised that this should not be a problem for  most of us, as the air should flow easily through the dovetail joints)

There is a slight dip along the sides of the drawers from the front end near the dovetails, again so that the drawer slides and does not bind. This is planed or scraped off.

Leo went over orbital sanders.
Use a slow speed and pass the sander in a straight line and slowly down the length of the work piece.
Leo explained various styles of files.
A certain amount of profanity and swearing ensued.
The “Bastard” has grooves cut obliquely. The term is derived from ancient sailing terms that refer to cutting the triangular sail. The hypotenuse edge of the sail was referred to as a "bastard " cut, while the base and other side were square cuts.
Leo explained how to use limestone and masonary bond to make a paste to bond the salad bowl assembly unit. Using this allows one to soften the bond with thinner and rework it , if it needs a tighter bond.
The limestone can be screened using one of the coffee maker filters...(The ones with the fine mesh).

Tips: triangular scraps can be glued up to form a triangular cutting board. No waste!
Curved chair top ends can be reworked as curved serving trays.. like oriental pieces.
You could let on they were done deliberatley.

Wonderful evening.
See attached photos for this evenings workshop.


Table project

Tuesday, June 7, 2011

Minutes

June 7,2011 Jimmy Mac, Chris, Paul, Robert, Miles

1 Firstly Leo discussed the compression chuck that we had made for hollow turning a vase. Paul had his and the process to align it correctly with the tail stock was reviewed:

Mount the plywood disc, which has been screwed to the faceplate and has had a hole drilled in it for the large bushing.
Screw this large bushing into the hole, which has been filled with eopxy.
The fit needs to be a bit loose.
Screw the small “split” bushing (2 inch) into the big one.
Mount a wooden turning into the 2 inch split bushing and center the opposite end to the tailstock.
Jam the tailstock against the assembly and lock it there until the epoxy has dried.
The result should be a chuck that aligns with the tailstock every time.

2 Next Leo discussed circular saw blades. They are not flat.
They have an area that has been “hammered”, resulting in a “wavy” blade.
When the saw revs up to full speed, this area actually flattens out due to centrifugal forces.

The blade will have a critical speed..at that speed it will begin to wobble out and shatter. This is not necessarily the fastest speed. This issue is more critical with large blades such as are used in saw mills.

3 Finishing:

A) Shellac
White shellac is bleeched orange shellac.
Shellac is best if flakes are freshly dissolved. Otherwise the mixture does deteriorate over time. There is a special solvent but alcohol is the original one.
Water and alccohol will blemish shellac so it is not a good finish for items that will be handled or table tops. Best for things like a grandfather clock or wall hanging.
Use a good brush. A good one will cost $200.00 or more! Artist shop brushes are good to use.

Finish sand the wood
Apply a layer of shellac with a brush. At first the result is wavy ridges.
Keep the brush moving back and forth for a long time to smooth the finish. Continuous brushing causes the shellac to meld better (it dissolves into itself so to speak) and eventually the finish is smooth and free of wavy lines.
Let the finish dry and harden (24 hours).
Sand it off.

Then you can stain the shellac!

Apply a layer of oil stain with a foam brush.
Wipe if off with a cloth.Then use a clean dry brush and brush repeatedly , wiping off the brush periodically, until you have an even stain. This is “dry brushing”.
Once the stain is even, Let dry and harden (24 hrs)..
Overcoat with another layer of Shellac.

VERY IMPORTANT!
This time use one brush stroke only.
Do not go back over this stroke.
If you missed a spot wait until everything is dry before coating that spot.
Dry 24 hours for maximum hardness.
You can repeat the whole process to darken the stain.
Last coat is the shellac which is rubbed and polished.

A water based finish like Acrylic can be used in the same fashion as the Shellac process.
Apply finish, using same tecchnique of brushing repeatedly until smoothness has resulted.
Dry
Sand
Apply Stain, wipe it off, and using “dry brush” technique, smooth and even the application.
Repeat the finish layer once dry and sand again.
Re-apply more stain to darken..dry brush technique.
Last coat is the finish and then polish it up.

Coloured Lacquers are another option but they take “Leo-like” skill to apply evenly.
(Not for amateurs)

Paul had two small vases that were stained using aniline green, which highlighted the grain of the ash but the end grain in the top recess, where the candle goes, was blotchy. Leo suggested using a red lacquer to coat the inside of the vases.
The result was striking!

Learning Points:

Shellac is NOT resistant to water or alcohol.
“Dry brushing” is a way to get an even stain.
Keep brushing until you have a smooth result in tone and eveness and USE a good brush.
“Layering” is a technique of applying finish, applying stain, overcoating with more finish, applying more stain to darken and repeating the process until the colour is achieved.

One can’t apply Lacquer over shellac

TIP

Wrap your brushes in tin to preserve shape. The tin is folded around the business end (bristles) of the brush.

4 Leo went over how to hand sharpen an auger bit, which Miles brought in.
File the blade part, the outside round and the spur, using a hand file.


We agreed to meet again in two weeks to get the wood from the Kiln.

Tuesday, March 15, 2011

Minutes-March 15/11

Most recent meeting minutes:


March 15,2011

Paul, Peter Stanford, Mike MacLean, Wayne, Wilson, Rick, Naq, Mathew, Miles,
Lawrence, Robert, Chris, Frank Chaison

Leo discussed Lacquer.
The origin of lacquer is from the Rhus tree, whhich grows in Japan and China. The sap of the wood is the essence of lacquer.It is poisonous. Sumac is a local tree that is in the same family.

Natural lacquer is durable. It needs moisture to cure.
Leo told the story of a shipwreck that was discovered in an Archipelago around Japan/China. The ship had a cargo of Lacquerware (paper that was coated numerous time with lacquer until it was hard) andd when it was raised the items were in pristine condition even after 500 years in salt water!

France discovered that bugs that ate the Rhus tree were full of lacquer and it could be crushed out of them.
Alcohol was used as a solvent for it.
The French used red wine for this!

White shellac can be mixed with fillers such as soot, Tempera to form a colored finish.
It dries fast and if one adds a second coat, it will dissolve the first coat so one works quickly.

Modern lacquer is made from Nitrocelluloids with other additives to make it flexible (since wood is constantly moving).

Mix white shellac with any Tempra colors.
Shellac flakes dissolve in alcohol or methyl hydrate.
Orange shellac is the better quality.

Fillers such as limestone (CaCO3), Portland cement,Mesussa cemeent, and whiting can be used with Masonary bond to form excellent pore fillers for open grain woods.

Gorilla glue has to be applied to wet wood.
It has a short shelf life.

Leo asked that everyone do a candle vase template for the next session.
This was described in previous minutes.

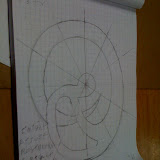
Leo and Robert went over the method for enlarging an irregulat sketch using a compass and bevel to transfer measurements.

Transfering Drawings and Ecceentric turning and sanding