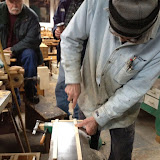
Tuesday, April 17, 2012


Peter, J Maclean, Chris, Rick, Mike, Paul, Miles, Brian
Tips:


Thicknessing:

Bevel the end of a board to minimize snipe or cut the board on an angle. The snipe will be on the pointed waste end of the board then.

Table saw tune-up: 

1 Square the blade to the slot (may require shifting the table top/trunions) Test by running a piece across the blade powered on and listening to hear the ring as the wood hits the near side and then the far side. If one ring is not heard, the blade is not square with the miter slot. 

2 Square miter to the fence by running a board through the blade as a cross cut and seeing if it then abuts squarely against the fence and does so again if the piece is flipped 180 degrees over 

3 Square fence to table top. This may require that you add a wooden piece to the fence and jimmy it to get a square fit 

4 Finally square blade to table top using the tilt mechanism of your saw


Salad bowl  finish container  

Cut hardwood squares to laminate and Glue up the squares and turn to a 3 3/8 diameter cylinder and 2 inches height Drill hole in top 9/16 diameter Turn a “shelf” 2 1/2 inches

Table continued:

It is very important to mark all the members with arrows to denote proper alignment for glue up and subsequent work such as grooving.
Use arrows to point which way the member aligns.
Mark a diagonal line on top of each leg to denote which part is inside on assembly
Do the same with aprons


Cutting out the drawer opening:


Draw the outline  or the opening precisely around all four sides of the front apron
Set up a jig on table saw to cut the long side part ..see video
Use a jig to chop out the end lines precisely


Table project


Sunday, April 8, 2012

October 26/10 meeting


Jim Hiltz, Jim Maclean, Paul, Chris, Frank, Naq, Miles, New member Wayne, new member Matt Wilcox, New member Brant McGowan

Leo discussed ways to re-use carbide cutters that come from a spiral cutterhead of a planer.
The pepper mill project went ahead a notch.
Paul had a piece of stock.
The stock is drilled out to the 1 1/16 bore with a forstner bit

Leo suggested we make a mandrel out of wood to run up the center of the stock. A notch is cut along the side into which is placed a piece of plastic which will act as a choke and jam the mandrel against the inside of the workpiece, thus allowing one to turn the piece properly centered.


Leo discussed the Longhorn chuck and noted that this was an old invention.

Table saw tune-up: squaring the blade to the fence and miter gauge


The fence must be parallell to saw blade.
Rotate blade 180• to check to see if it is straight.
Then square the fence to table top AND  PARALELL TO THE FLAT OF THE BLADE
Then use the flat of the blade (not the teeth)  to set square to the table
Finally, set the mitre gauge to blade flat 
Then  this should be automatically square to the fence.

(Leo's adivce)

Saturday, April 7, 2012

sanders on ebay

hi guys, Miles here. just looking on Ebay and found 2 sanders like Leo's dual pad one. go to Ebay's advanced search and look up item number 300691762140. it is a Sundstrand and there are 10 available. the other is a single  Stuhr 4000F-1 it is item number 160777651928. I'm not personally interested but if anyone is and not in Ebay's system let me know. I don't mind buying for others.

Thursday, April 5, 2012

Tips on staining

POTASSIUM DICHROMATE

(Bichromate of Potash)

Potassium Dichromate is a water soluble chemical stain that reacts with the tannin in the wood. The oxidizing action replicates and accelerates natural aging and darkening associated with UV exposure. The results are rich tones, with clarity of
the wood grain and pattern. Traditionally Potassium Dichromate is used to darken Cherry, Mahogany, Oak or Walnut.

Preparation:
-- Mix in Plastic or Glass only.
Dissolve the Potassium Dichromate
•• 1 teaspoon in 8 Oz, of hot water
or
•• 4 oz by weight into 1 Qt .hot water (100g into 1L).

Test the result on a spare piece of wood.
The color can be darkened by adding more powder or lightened by adding water.

Directions:Apply with the grain using a brush, rag or sponge.
Use two successive coats to help eliminate lap or streaks and
to assure a more even tone when dry. Wipe off any excess with a rag.
Pre-wetting the surface, just prior to application, will aide in even absorption of the Dichromate solution. Use Clean water and a damp (not dripping) sponge or rag.

Allow to dry at least 12 hours, then rub down lightly with a
fine synthetic pad or #0000 Steel Wool, before applying a finish.
Any finish can be used over the 'stained' wood.
Danger: Strong Oxidizer -- USE Eye and Skin Protection.

Avoid contact with eyes, skin, & clothing.
Avoid Breathing dust. Use with adequate ventilation.
Wash hands thoroughly after handling.
If eye contact or swallowed, call a physician.

Tuesday, April 3, 2012

Most recent meeting minutes:

Paul, Lawrence,Rick, Peter, Mike, Miles,  J Maclean, Chris
Leo has perfected the salad bowl finish container and he showed how it works. We will all do one. We need to turn a top to approximately a diameter of 3 5/8 and height of 2 inches. (Make it a little oversized first.) We need one liter IV bags. The bags can be heated a little and they will stretch to fit this top diameter. (3 5/8). The seal will be done with concrete bond and white cement.
The top should be made by glueing up layers of hardwood. Don’t use plywood.

Leo went over several tips on accurate thickness planer use.
1 Lift the wood as it enters the infeed and again lift the exiting end as it leaves
2 The rollers should be accurately adjusted to be just a hair above the platform so as to grab the wood that enters and leaves
3 Run wood in at an angle to minimize snipe 
4 Use a planing board to plane thin pieces. Make it as wide as the thicknesser will accept and snip off the ends at an angle. Make the board exactly one inch thick ( end stop included) so that the guage on the thicknesser can be used.
Tenons:
Can use a dado on the saw or a tenon jig and fence.
Be accurate.
Use the jig shown in the photos to hand plane a tenon.
For a 3/4 board with a 5/16 tenon, the jig should be made with 17/32 size guides and add a strip of paper under the guides to get an accurate tenon. See photos.
A rabbet plane is uses to plane the tenons. 

Table project