Tuesday, February 19, 2013

Feb 19/13


February 19/13

Brian,Rick,Lawrence, J Hiltz, Miles, Chris

We decided on two projects:

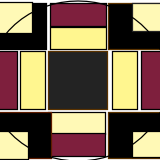
1 Bar stool with four legs: top 10-11 inch diameter, legs 30 inches
2 Tapered vase.

Leo went through the methods of reducing the scale of a dimensional drawing. 

The vase is 27 inches tall and 7 inches diameter at the base.

We reduced it by half, using a compass and divider method.

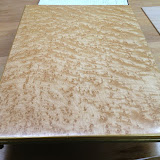
The glue up block should be contrasting wood colors.


Vase prooject Feb/13


Tuesday, January 29, 2013


Jim MacLean, J Hiltz, Rick, Chris, Miles, Roy, Scott MacLeod, Brian, Paul

Work continured on the trays and rolling pins.
Leo reviewed the finish:

Stain, salad bowl finish x 2, gold acrylic, rub off with Methanol, salad bowl finish.

Leo demonstrated a steel jig he ade to cut three inch sand paper discs on the drill press.

Leo demonstrated a planer that is used on the drill press to plane off a surface.
He showed how to flaten a glued up piece using this method.

Leo discussed table saw blades, explaining the hollow ground type and demonstrating how a swedge is used to flare the teeth
Curved serving tray

Wednesday, January 9, 2013

Post Xmas meeting

Lawrence, J Hiltz, Paul, Miles, J Maclean, Roy, Chris
(Rick called in sick!)

The lads met on January 8/13 after the Christmas Holliday.
Work continued on the rolling pins and the Sushi tray.
Paul had a turned rolling pin that had no centre drilled.
Leo demonstrated how to drill it on the lathe.
To protect the wood, tape some wooden blocks of equal thickness on the jaws of the 4-jaw chuck.
This is to protect the wood.
The piece is held between centres.
The headstock chuck is rotated and the jaws are tightened in individually until the wood is centered.
An accurate way to do this is to place one end of a long stick under the workpiece, extending away from the lathe and resting on the tool rest.
As the headstock is turned by hand the far end of this stick can be seen to go up and down according to the degree that the piece is out of centre.
Adjust the jaws accordingly until there is very little movement at the end of the stick.

Leo has been granted the Order of Canada and a celebratory cake was presented in this great honour. We all agreed that it his high time that this award was given to the Professor.

Two new people attended from Louisbourg:
Gary Perry and Bennie Fudge 

Tuesday, December 4, 2012

Biweekly meeting

December  04 ,11, and 18 , 2012

Scott MacLeod, a new member, attended tonight.Jim Maclean, J Hiltz, Paul, Brian, Roy Troke, Rick were also in attendance.

We continued to work on the serving trays.
Most people have the tray glued and the feet parts ready to cut to shape.
Leo explained how to round the edges of the tray using hand plane and spokeshave and sand paper.
The edges are then coated with a bond: whiting or porter cement and acrylic bond.
Layer this along the four edges and sand it off once dry.

Leo also gave some instructions on making a rolling pin.
The wood glue up was explained.

Once piece for the center 7/8 inches thick by 2/12 wide:
Glue up two different color woods for the outside
and bisect them on the diagonal, lengthwise.

We will make a center dowel.
Bring a length of wood a little more than 3/8 thick and 22 inches or so long for the next workshop.
We practiced making this dowel with Leo's special dowel maker, which worked like a charm.

Tuesday, November 20, 2012

Paul, J Hiltz, Naq, Miles, J Maclean, Lawrence, Rick, Brian, Charles McGuigan (new)

Work continued on the serving trays.

The leg pieces were cut.
The stock is about 1 1/2 inches wide and 7/8 thick and about 16 inches long.
The curved recess is done on the table saw  by running the piece across the blade  in a perpendicular direction, thus scooping out a recess. The blade is positioned just a shade above the table top for this and a fence is placed across the top of the table near the blade.

The profile is then scraped using a curved scraper  as close as possible to the shape desired.
Then it is sanded.

The bottom edge is then passed across the jointer to get a 29 degree angle.

The piece stands  on this edge and is held , end on, against the tray(which is supported on two sticks to raise it up) and a pencil mark is made to draw the curve that  matches the bottom curve of the tray.

This profile is then cut by making various passes on the jointer .
It is finished using a hand plane and sanding.

It will be then profiled  using the band saw and a jig to hold the curved edge flat on the table.
This is a flat thin strip glued to the bottom of the foot piece .
Once profiled this way, the stick is cut off.
It is then screwed onto the tray bottom and the sanding jig is used to make the bottoms even.

Staining:

Folkart outdoor metalic gold paint (Walmart)
Mohalk black stain, Salad bowl finish

Apply 2 coats black
Salad bowl finish
Gold coat
Sand off the gold.
The grain will highlight in gold
Salad bowl finish several coats

See photos.

Paul distributed cans of Behlens Salad Bowl finish at a bargain price.

Curved serving tray


Tuesday, November 6, 2012


Serving Tray

Miles, Brian, J Hiltz, J Maclean,Paul
We discussed the fall show and decided that it would be better to work on an Easter show as it is late in the year now.
Leo went over some Tips;
Paint brushes can be suspended above bottom of the jar in the thinner layer to keep the bristles straight; wrapping the bristles in a foil wrap also helps.
When cutting plywood, use a hollow ground blade with no set in the teeth and use a sled. He made one that has a masonite base. Each side of the masonite can be tapped into the blade to creat a zero clearance cut and this results in no splinttering of the stock cut.
A piece of wood can be hollowed out by running it perpendicular across the blade. Various shapes can be done this way (See photos)
We decided on a serving tray project..Japanese style curved tray.
This is done using layers of plywood eg one 1/4 inch and one 1/8 inch piece. The finished thickness needs to be able to accept screws for the feet so don't have it too thin.
These are glued together on a caul that can be adjustable. Use yellow glue. After the clamps are tightened, wait a few minutes and undo them since the plywood pieces slide on the first tightening. Reposition them and retighten.

The photos show the jigs used to do this.
The feet are cut from a hardwood like walnut..a contrasting color.
The project will be about 14 x 11 inch .
The feet will be 8 1/8 x 2 1/8 with a curved profile.
The feet are positioned 3 3/4 inches from the end of the tray.
Use a piece of stock about 7/8 thick to do this.
Leo will buy the necessary plywood and lend us the jig to make the glue-up.
We want this done before Xmas.
Curved serving tray

Tuesday, October 9, 2012

Paul, Rick, Jim

Paul brought an applewood blank and Leo took us through the process of mounting it on the new turning tool and measuring out the dimensions needed to set the tool. The process was very smooth and the bowl was hollowed out in very short order.

Leo also reviewed the process of turning vases and finding and boring the center hole.
The lathe needs to be lined up perfectly to do this.
The blank needs to be secured solidly in the headstock.
A short stout bit the same diameter needed for the finished hole is used to start the hole.
This creates an accurate center hole and then one can change to a longer bit which will follow through the first hole more accurately than if it were used alone to make the hole.

Next session is in two weeks.
Some visitors from the Halifax woodwork club will be visiting Leo's shop.


Saturday, September 29, 2012


Blacksmith, forge project
Leo helped me (Paul)  go through the forge technique.
Made a sturdy chisel for rough cutting and a "cold  chisel"
Start with good coal..heat forge up to hot fire
Spread coal around periphery of center flame to bake
Hold the piece in the flames until cherry red (keep withdrawing to check the color; white hot is too hot)
Hammer the piece to shape on the anvil  and reheat and continue the process until the desired shape is attained.
One can then grind the piece to refine the shape and the edge and to get a clean surface so as to tell the colors in the fire for the next step.
Reheat the tip slowly to a cherry red and dip in oil to cool.
Clean it off on the grinder to expose clean surface.
This is so that you can see the color changes in the next step.
Place the piece in the fire and slowly bring the color to a yellow-brown.
Withdraw frequently so as not to pass this temperature.
Cherry red is too hot and you woul have to recool the metal in oil and start again.
When the yellow-brown colow is attained, check the edge to see if it will file off. If it is still too hard, it won’t file off and that means redo the process to get the yellow-brown color.
Clean up the piece and sharpen it as needed on the grinder.

Tuesday, September 25, 2012

The first  meeting of the year was held tonight.
present were Paul, J Hiltz, Miles, Brian and Robert.

We decided to start the forge course.
Leo suggested a chissel and demonstrated one that would be good to make.

He then went over his new invention for rounding out the inside of a bowl.
This tool takes all the hard work and most of the sanding chore out of the project.
We did not have any suitable bowls prepared to work with but by next session people should make a bowl with the outside finished and make a dovetail base on it.
This will be mounted in the lathe to use the new tool.

Leo then demonstrated the method  used to drill out and shape vases from rough stock.

Tuesday, June 12, 2012

Rick, Jim Hiltz, Jimmy MacLean and Paul and Mike

We continued to practice dovetail joinery.
Leo assisted Paul and Rick and Jim with the salad bowl project.
Agreed on a lobster party July 6, friday starting at 6 p.m.

That finishes the year's schedule.
We will start up this fall on the forge workshop.