Tuesday, May 29, 2012

Peter, Mike, Paul, Rick, Miles, Chris
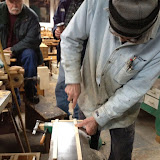
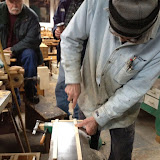
We continued to work on the dovetail joinery. 
See the photos as it is hard to describe how this is done.
Leo discussed finishes for the tables.
Leo demonstrated the half blind dovetail for the drawer fronts.
Tung oil is good to use. It wipes on and several coats can be appklied a day or so apart. It can be waxed with carnuba after that.
Use 800 grit sand paper to apply carnuba. A very small amount is used.
 Use a denim cloth to rub mor on if necessary. Do not use a soft cloth. 


We discussed a summer party.
July seems to be the only time suitable.
We will work on a time but not all members will be around for it unfortunately.


Table project

Tuesday, May 15, 2012


J Hiltz, Chris, Lawrence, Miles, Paul
Side Table Project
(For the salad bowl finish project, get a 3/8 nipple and a 4 inch web clamp)
Dovetail joinery:
Cut stock absolutely square
Align the mating pieces and mark the tops with an arrow for orientation on assembly.
For regular dovetails, cut pins first and space them evenly.
Make the end one large because a groove will be cut for the drawer bottom.
Use a sharp pencil.
Use the mating piece to scribe the pencil line along the bottom end of the pieces.
The pencil line is a guide. Later the exact width will be scribed with the marking guage.
Bring the pencil lines down along the sides perpendicular.
Cut down on the pencil lines with a saw.
Now use the marking gauge to scribe a groove along the bottom of the pieces that will be cut away (the waste) only. Don’t scribe along the part that is to be left in.
This way the finished project will look better..more professional.
Chop out the waste, using sharp chisels.
Chop out half the depth and then turn the board over to get at he rest.
Clean out the spaces with a sharp chisel making sure that the bottom of the slots are square.
Next cut the mating tails by first aligning the pieces and using a very sharp pencil to scribe the cut lines.
Cut down along the mark, leaving the line visible.
This makes for a tight fit.
The use the marking gauge to scribe the sharp groove on the bottom of the pieces to be chopped away.
Cut off the end segments and the waste pieces in the center and do a practice fit.
Clean up as necessary.
Don’t keep reassembling the joint as this will make it loose.

Saturday, May 5, 2012


Table project Instructions

Make sure the table saw is tuned up square before beginning
Make sure that the wood is well dried
1 Design the table and write all measurements for the legs, aprons, top
2 Choose stock--material list: Height-24 3/4: With 20-24: Depth 17-18

Top-3/4 to 13/16 thickness
Glue up , flatten with planer or hand plane, and then clamp it straight and let it accommodate for a few days to prevent warping.
Aprons-same thickness as the top usually. Make sure that your measuremnts include the tenons length.
3 Legs
Make a Story-stick with all the rounds and profiles drawn on and use it to make identical turnings
Start with squared stock at 2 inches width or a fraction less
Measure off where the Pommel ( the top square part) will end
Draw lines around all four sides at tis point
Wrap Masking tape along the line edges (to prevent tear-out when turning)
Start turning well below the end of the pommel and work up towards it.
Try to cut straight in by the masking tape
Profile the rest of the leg
  Sand the legs 
4 Drill the mortices in the legs on two adjacent sides where the aprons will join, bringing the apron edge in about 1/8 from the edge of the leg
Mortices should be deep and less than the length of the apron’s width so as not to create a visible gap at the bottom of the apron.
5 The leg edges are in about 3/4 inches from the table top along the front and back and about 1 1/4 in from the sides. Use this measurement to figure out the apron lengths and don’t forget to allow for the tenons when cutting the stock for the aprons
6 Cut the tenons on the ends of the aprons, making sure that they are cut squarely.
Do this using a tenon jig or the table saw.
The final thickness of the tenons is reached using a jig and hand plane ( rabbet) 
to make the tenon the exact thickness that the mortice openings are ,less a hair!
7 Cut the profiles on the tenons so that they interlock when assembled (haunched mortice and tenon joint). Make the joint snug.
8 Dry assemble the table parts and mark the tops of the legs with a mark to denote the inside corner. The best faces will be on the outter visible sides and flawed faces on the inner sides. Mark the tops of the aprons with an arrow pointing inwards so that when doing the grooves for the buttons, they are  cut on the correct side of all four pieces.
9 Mark the opening for the drawer, choosing the best apron for the front.
Bring the lines right around all four sides of the aprons.
Make the edge of the drawer opening at least one inch from the top and bottom of the apron because groves will be cut on the inside edge and you want lots of room for this so that the groove won’t weaken the remaining part of the apron opening.
Cut out the long sides of the opeining on the table saw, carefully, using stops or markings on the fence to know where to stop the cut.
Use a hand saw to bring the cut all the way down to the markings
Then use a sharp chisel to chop out the opening waste. 
Start the chop in from the line and chop it down to the center and then turn the apron around to chop out the other side.
Use a sharp chisel and then a file , preferably a planemakers float, to bring the cut down to the lines on all four sides of the opening. A jig is used to do this.
10 Next cut the grooves for the buttons all around the top inside edges of the aprons (tops only). Usually this is a 1/4 inch groove. The button will slide into the groove and be screwed to the underside of the top. This keeps the top flat and yet allows for movement of the wood.
11 Make enough buttons to secure the top...depends on the length and width how many are needed.
12 Drawer runners are next.
The ones at the top will have a tenon that will fit into the groove that was cut for the buttons but the thickness of this piece is shy of the top a little.
The ones at the bottom will fit into a mortice that is cut on the bottom inside of the front and back aprons.

Tuesday, May 1, 2012


Paul, Lawrence, Rick, J MacLean, Peter, Mike, J Hiltz, Chris

(Mr. Hiltz was conspicuously quiet this evening; Leo was vigorous)
Reviewed the table assembly. Leo has his table completed. (See photos)
The drawer opening should be cut neatly and the end section finished with a file, using a jig in the vice to keep it neat and flat.
Reviewed dustcovers , which are panels that go between each layer of drawers.
The back end piece of the drawer is usually lower to avoid striking and to allow air flow so that the unit opens and closes smoothly. The drawer should close with the sound of a bank vault door.

(Leo surmised that this should not be a problem for  most of us, as the air should flow easily through the dovetail joints)

There is a slight dip along the sides of the drawers from the front end near the dovetails, again so that the drawer slides and does not bind. This is planed or scraped off.

Leo went over orbital sanders.
Use a slow speed and pass the sander in a straight line and slowly down the length of the work piece.
Leo explained various styles of files.
A certain amount of profanity and swearing ensued.
The “Bastard” has grooves cut obliquely. The term is derived from ancient sailing terms that refer to cutting the triangular sail. The hypotenuse edge of the sail was referred to as a "bastard " cut, while the base and other side were square cuts.
Leo explained how to use limestone and masonary bond to make a paste to bond the salad bowl assembly unit. Using this allows one to soften the bond with thinner and rework it , if it needs a tighter bond.
The limestone can be screened using one of the coffee maker filters...(The ones with the fine mesh).

Tips: triangular scraps can be glued up to form a triangular cutting board. No waste!
Curved chair top ends can be reworked as curved serving trays.. like oriental pieces.
You could let on they were done deliberatley.

Wonderful evening.
See attached photos for this evenings workshop.


Table project

Tuesday, April 17, 2012


Peter, J Maclean, Chris, Rick, Mike, Paul, Miles, Brian
Tips:


Thicknessing:

Bevel the end of a board to minimize snipe or cut the board on an angle. The snipe will be on the pointed waste end of the board then.

Table saw tune-up: 

1 Square the blade to the slot (may require shifting the table top/trunions) Test by running a piece across the blade powered on and listening to hear the ring as the wood hits the near side and then the far side. If one ring is not heard, the blade is not square with the miter slot. 

2 Square miter to the fence by running a board through the blade as a cross cut and seeing if it then abuts squarely against the fence and does so again if the piece is flipped 180 degrees over 

3 Square fence to table top. This may require that you add a wooden piece to the fence and jimmy it to get a square fit 

4 Finally square blade to table top using the tilt mechanism of your saw


Salad bowl  finish container  

Cut hardwood squares to laminate and Glue up the squares and turn to a 3 3/8 diameter cylinder and 2 inches height Drill hole in top 9/16 diameter Turn a “shelf” 2 1/2 inches

Table continued:

It is very important to mark all the members with arrows to denote proper alignment for glue up and subsequent work such as grooving.
Use arrows to point which way the member aligns.
Mark a diagonal line on top of each leg to denote which part is inside on assembly
Do the same with aprons


Cutting out the drawer opening:


Draw the outline  or the opening precisely around all four sides of the front apron
Set up a jig on table saw to cut the long side part ..see video
Use a jig to chop out the end lines precisely


Table project


Sunday, April 8, 2012

October 26/10 meeting


Jim Hiltz, Jim Maclean, Paul, Chris, Frank, Naq, Miles, New member Wayne, new member Matt Wilcox, New member Brant McGowan

Leo discussed ways to re-use carbide cutters that come from a spiral cutterhead of a planer.
The pepper mill project went ahead a notch.
Paul had a piece of stock.
The stock is drilled out to the 1 1/16 bore with a forstner bit

Leo suggested we make a mandrel out of wood to run up the center of the stock. A notch is cut along the side into which is placed a piece of plastic which will act as a choke and jam the mandrel against the inside of the workpiece, thus allowing one to turn the piece properly centered.


Leo discussed the Longhorn chuck and noted that this was an old invention.

Table saw tune-up: squaring the blade to the fence and miter gauge


The fence must be parallell to saw blade.
Rotate blade 180• to check to see if it is straight.
Then square the fence to table top AND  PARALELL TO THE FLAT OF THE BLADE
Then use the flat of the blade (not the teeth)  to set square to the table
Finally, set the mitre gauge to blade flat 
Then  this should be automatically square to the fence.

(Leo's adivce)

Saturday, April 7, 2012

sanders on ebay

hi guys, Miles here. just looking on Ebay and found 2 sanders like Leo's dual pad one. go to Ebay's advanced search and look up item number 300691762140. it is a Sundstrand and there are 10 available. the other is a single  Stuhr 4000F-1 it is item number 160777651928. I'm not personally interested but if anyone is and not in Ebay's system let me know. I don't mind buying for others.

Thursday, April 5, 2012

Tips on staining

POTASSIUM DICHROMATE

(Bichromate of Potash)

Potassium Dichromate is a water soluble chemical stain that reacts with the tannin in the wood. The oxidizing action replicates and accelerates natural aging and darkening associated with UV exposure. The results are rich tones, with clarity of
the wood grain and pattern. Traditionally Potassium Dichromate is used to darken Cherry, Mahogany, Oak or Walnut.

Preparation:
-- Mix in Plastic or Glass only.
Dissolve the Potassium Dichromate
•• 1 teaspoon in 8 Oz, of hot water
or
•• 4 oz by weight into 1 Qt .hot water (100g into 1L).

Test the result on a spare piece of wood.
The color can be darkened by adding more powder or lightened by adding water.

Directions:Apply with the grain using a brush, rag or sponge.
Use two successive coats to help eliminate lap or streaks and
to assure a more even tone when dry. Wipe off any excess with a rag.
Pre-wetting the surface, just prior to application, will aide in even absorption of the Dichromate solution. Use Clean water and a damp (not dripping) sponge or rag.

Allow to dry at least 12 hours, then rub down lightly with a
fine synthetic pad or #0000 Steel Wool, before applying a finish.
Any finish can be used over the 'stained' wood.
Danger: Strong Oxidizer -- USE Eye and Skin Protection.

Avoid contact with eyes, skin, & clothing.
Avoid Breathing dust. Use with adequate ventilation.
Wash hands thoroughly after handling.
If eye contact or swallowed, call a physician.

Tuesday, April 3, 2012

Most recent meeting minutes:

Paul, Lawrence,Rick, Peter, Mike, Miles,  J Maclean, Chris
Leo has perfected the salad bowl finish container and he showed how it works. We will all do one. We need to turn a top to approximately a diameter of 3 5/8 and height of 2 inches. (Make it a little oversized first.) We need one liter IV bags. The bags can be heated a little and they will stretch to fit this top diameter. (3 5/8). The seal will be done with concrete bond and white cement.
The top should be made by glueing up layers of hardwood. Don’t use plywood.

Leo went over several tips on accurate thickness planer use.
1 Lift the wood as it enters the infeed and again lift the exiting end as it leaves
2 The rollers should be accurately adjusted to be just a hair above the platform so as to grab the wood that enters and leaves
3 Run wood in at an angle to minimize snipe 
4 Use a planing board to plane thin pieces. Make it as wide as the thicknesser will accept and snip off the ends at an angle. Make the board exactly one inch thick ( end stop included) so that the guage on the thicknesser can be used.
Tenons:
Can use a dado on the saw or a tenon jig and fence.
Be accurate.
Use the jig shown in the photos to hand plane a tenon.
For a 3/4 board with a 5/16 tenon, the jig should be made with 17/32 size guides and add a strip of paper under the guides to get an accurate tenon. See photos.
A rabbet plane is uses to plane the tenons. 

Table project