
Thursday, February 2, 2012


Tuesday, January 31, 2012
Table continued
Wayne, Peter, Mike, Rick, J MacLean, Miles, Paul, Lawrence
Leo discussed glueing up panels.Once stock is planed, stand the pieces on edge and clamp together with spacers for a week so that air can circulate and let them accomodate to the humidity equally and prevent a warp.
Once glued up, routing grooves on the underside invisible surface can prevent warp. (Don’t rout right out to the end of the panel however as then the groove will be visible on edge.
If you intend to profile the edges, leave enough width so that you can rout the end grain edge
( which results in tear out) and then rout the panel to final width and routh the other edges (with the grain).
Once the top panel is done and the legs profiled, next is to cut the aprons to fit the assembly. Apron ~4 1/2 inches wide. This allows 1 1/2 inchs top and bottom for the drawer to fit.
The tops of the legs are spaced differently from the sides and fonrt/back of the panel.
The distance on top is 3/4
Side is 1 1/4
See the photos attached to this posting for a better idea of what this means.
Leo discussed planes and plane blade angles of attack, cap iron sharpness.
The primus plane is the best for flattening a top. The blade is adjusted by tapping the plane. The ones with the knob on end to advance the blade are more tedious to operate.
He then discussed scrapers and how to use and sharpen them.
Remember to take the sharp corners off the cutting edge.
Hint: Don’t use diamond stones to sharpen ferrous metal blades.
It wears awary the diamonds.
Leo discussed glueing up panels.Once stock is planed, stand the pieces on edge and clamp together with spacers for a week so that air can circulate and let them accomodate to the humidity equally and prevent a warp.
Once glued up, routing grooves on the underside invisible surface can prevent warp. (Don’t rout right out to the end of the panel however as then the groove will be visible on edge.
If you intend to profile the edges, leave enough width so that you can rout the end grain edge
( which results in tear out) and then rout the panel to final width and routh the other edges (with the grain).
Once the top panel is done and the legs profiled, next is to cut the aprons to fit the assembly. Apron ~4 1/2 inches wide. This allows 1 1/2 inchs top and bottom for the drawer to fit.
The tops of the legs are spaced differently from the sides and fonrt/back of the panel.
The distance on top is 3/4
Side is 1 1/4
See the photos attached to this posting for a better idea of what this means.
Leo discussed planes and plane blade angles of attack, cap iron sharpness.
The primus plane is the best for flattening a top. The blade is adjusted by tapping the plane. The ones with the knob on end to advance the blade are more tedious to operate.
He then discussed scrapers and how to use and sharpen them.
Remember to take the sharp corners off the cutting edge.
Hint: Don’t use diamond stones to sharpen ferrous metal blades.
It wears awary the diamonds.
 |
| Table project |
Sunday, January 29, 2012
January 28,2012---Naq's new Lathe
Many of the members (Rick, Paul, Jim MacLean, Jim Hiltz, Peter, Chris, and guest Donnie Campbell (Yes the famous Donnie!)) met at Tim Horton's for breakfast and the proceeded to Naq's house on St. Peters Road to help assemble his new General International lathe.
Lots of fun!
Lots of fun!
Tuesday, January 17, 2012
Meeting
Jim Hiltz, Jim MacNeil, Peter, Mike, Chris, Miles,Wayne, Paul
We began work on the table project.
Step 1 Sketch a design
Eg top 18x16,, drawer, leg shape
Step 2 Material list
Choose stock for top: 6-8% moisture content is best
Leo chose a large board of cherry and cut it into 18 inch pieces--three for the top
Flatten one side on the jointer, choosing grain direction to minimize tear out
Flatten the second side on the thickness planer again being careful with grain direction
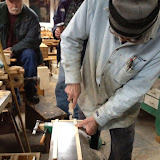
Leo demonstrated a jig to use the jointer as a thicknesser..see photos:
When one side is flattened, run the board along the table saw to make a cut along the top and bottom edges; there will be a rough section left in the center; run the board along the sled jig to remove this section until that side is flat and it should be parrallel with the opposite face now.
Next joint the edges of the boards.
Place the first board “marked side” in to the fence and the next board “marked side” out so that any discrepency in the jointer fence is cancelled out as the boards meet.
When boards are planed, align them with the end grain patterns alternating up and down if possible but the main thing is to get the top surface matching for pattern and grain direction.
Line them up and draw a reference mark along the top so that they can be reassembled correctly.
Glue up the panel , making sure the edges are flat and the joints flush.
Pinch together one end of the panel with a clamp. If the opposite end separates, the joints are not good.
Leo demonstrated his new jig for bowl turning.
He went over carbide blades, describing microcrystalline manufacturing.
Leo described how a thickneser works.
There are rollers that drag the wood through and the cutter rotates on top of the board.
The rollers tend to tip the board as it enters and leaves, leaving snipe at both ends.
The best machines have four rollers..two at each end so that the board is kept level as it rides along two rollers on entry and again on exit. Click the picture below to see a sketch of what this means!
We need to make the panel and turn four legs by next session.
We began work on the table project.
Step 1 Sketch a design
Eg top 18x16,, drawer, leg shape
Step 2 Material list
Choose stock for top: 6-8% moisture content is best
Leo chose a large board of cherry and cut it into 18 inch pieces--three for the top
Flatten one side on the jointer, choosing grain direction to minimize tear out
Flatten the second side on the thickness planer again being careful with grain direction
Leo demonstrated a jig to use the jointer as a thicknesser..see photos:
When one side is flattened, run the board along the table saw to make a cut along the top and bottom edges; there will be a rough section left in the center; run the board along the sled jig to remove this section until that side is flat and it should be parrallel with the opposite face now.
Next joint the edges of the boards.
Place the first board “marked side” in to the fence and the next board “marked side” out so that any discrepency in the jointer fence is cancelled out as the boards meet.
When boards are planed, align them with the end grain patterns alternating up and down if possible but the main thing is to get the top surface matching for pattern and grain direction.
Line them up and draw a reference mark along the top so that they can be reassembled correctly.
Glue up the panel , making sure the edges are flat and the joints flush.
Pinch together one end of the panel with a clamp. If the opposite end separates, the joints are not good.
Leo demonstrated his new jig for bowl turning.
He went over carbide blades, describing microcrystalline manufacturing.
Leo described how a thickneser works.
There are rollers that drag the wood through and the cutter rotates on top of the board.
The rollers tend to tip the board as it enters and leaves, leaving snipe at both ends.
The best machines have four rollers..two at each end so that the board is kept level as it rides along two rollers on entry and again on exit. Click the picture below to see a sketch of what this means!
 |
| From Table project |
We need to make the panel and turn four legs by next session.
 |
| Table project |
Tuesday, November 29, 2011
Meeting
November 29/11
Rick, Two Jims, Chris, Paul, Peter, Mike, Robert
Leo reviewed some math regarding finding angles for a polygon.
Take the number of sides, minus 2 and multiply by 180.This gives the total sum of all angles in the polygon.
Eg: 7 sided figure: 7-2=5; 5x 180=900: all the angles should add up to 900.
Leo showed hot to use a curve to make salad bowel spoons so as to maximize the yield from a piece of stock.
The trick is to have an identical curve on each edge of the pieces.
We decided to meet next on January 3/12
We decided to get Leo a bottle of wine and a fruit basket for Xmas.
Rick, Two Jims, Chris, Paul, Peter, Mike, Robert
Leo reviewed some math regarding finding angles for a polygon.
Take the number of sides, minus 2 and multiply by 180.This gives the total sum of all angles in the polygon.
Eg: 7 sided figure: 7-2=5; 5x 180=900: all the angles should add up to 900.
Leo showed hot to use a curve to make salad bowel spoons so as to maximize the yield from a piece of stock.
The trick is to have an identical curve on each edge of the pieces.
We decided to meet next on January 3/12
We decided to get Leo a bottle of wine and a fruit basket for Xmas.
Monday, November 21, 2011
Weekend CratftShow and Demonstration
November 18-20
The weekend show and sale went well.
Turnout was reasonable and the visitors were very pleased and interested.
Several members and Leo made sales and were pleased.
We decided to hold the next meeting two weeks hence.
The radio advertisement and the sign seemed to have had the greatest impact on attracting attention.
The weekend show and sale went well.
Turnout was reasonable and the visitors were very pleased and interested.
Several members and Leo made sales and were pleased.
We decided to hold the next meeting two weeks hence.
The radio advertisement and the sign seemed to have had the greatest impact on attracting attention.
Tuesday, November 8, 2011
Minutes
Beautiful Fall Evening:November 8, 2011
J Hiltz, Rick, Chris, Paul, Miles, Robert
We finished the sign for the Craft Show and moved it into place.
We then did some work on roughing out blanks from the applewood .
The fliers were distributed to the lads to circulate.
J Hiltz, Rick, Chris, Paul, Miles, Robert
We finished the sign for the Craft Show and moved it into place.
We then did some work on roughing out blanks from the applewood .
The fliers were distributed to the lads to circulate.
Tuesday, November 1, 2011
Minutes
Rick, Mike, Peter, Jimmy MacLean, Miles, Robert, Chris
We continued to work on the sign, completing the lettering.
It is ready to be placed on the roadside.
Paul and Rick rough turned a wet Maple log to be used as a demo on between center turnings.
Chris and Jim cut up some bowl blanks that will be used as demos as well.
Agreed on the final dates of November 18, 19, 20
Paul took the Curly Maple plate for the Hospital Auction.
Rick agreed to approach radio stations a week before the event.
Fliers are ready for printing and distribution.
Tip:
Letter and line spacing:
When you have a string of letters in sentences that have to be aligned accurately, place the leters vertically abutting against each other, measure the distance that remains in the alloted space, divide by the number of sentences or lines you want to have and this gives the distance apart that the lines will be.
Cut a strip of veneer or cardboard this width and use this as a spaced to line up the sentences.
_____________________________________________________________
A
B
C
D
E
↓
Measure from E to the bottom and divide by 5 to get the spacer width you need
Eg if the arrow length is 20 inches, then 5 inches is the space between lines that you want
We continued to work on the sign, completing the lettering.
It is ready to be placed on the roadside.
Paul and Rick rough turned a wet Maple log to be used as a demo on between center turnings.
Chris and Jim cut up some bowl blanks that will be used as demos as well.
Agreed on the final dates of November 18, 19, 20
Paul took the Curly Maple plate for the Hospital Auction.
Rick agreed to approach radio stations a week before the event.
Fliers are ready for printing and distribution.
Tip:
Letter and line spacing:
When you have a string of letters in sentences that have to be aligned accurately, place the leters vertically abutting against each other, measure the distance that remains in the alloted space, divide by the number of sentences or lines you want to have and this gives the distance apart that the lines will be.
Cut a strip of veneer or cardboard this width and use this as a spaced to line up the sentences.
_____________________________________________________________
A
B
C
D
E
↓
Measure from E to the bottom and divide by 5 to get the spacer width you need
Eg if the arrow length is 20 inches, then 5 inches is the space between lines that you want
Tuesday, October 25, 2011
Minutes
October 25/11
Mike, MacLean, J Hiltz, Miles, Chris, Paul, Robert, Rick
Leo has completed the vase for the show and the large bowl as well, save for a little painting.
Miles and Mike worked on cutting out lettering for the sign. The rest of the group did some preliminary work in preparing several blanks of Apple and Birch for the show.
Leo went over how to sharpen a chain saw for ripping. The dremmel, using the diamond bit was used although diamond drill bits are not great in cutting ferrous metals as they shatter a lot.
We decided to Auction off the Maple plate at the Fiddlers Green show Center 200 on November 26, which is the Hospital fund raiser.
We will distribute some fliers as best we can.
Mike, MacLean, J Hiltz, Miles, Chris, Paul, Robert, Rick
Leo has completed the vase for the show and the large bowl as well, save for a little painting.
Miles and Mike worked on cutting out lettering for the sign. The rest of the group did some preliminary work in preparing several blanks of Apple and Birch for the show.
Leo went over how to sharpen a chain saw for ripping. The dremmel, using the diamond bit was used although diamond drill bits are not great in cutting ferrous metals as they shatter a lot.
We decided to Auction off the Maple plate at the Fiddlers Green show Center 200 on November 26, which is the Hospital fund raiser.
We will distribute some fliers as best we can.
Tuesday, October 4, 2011
Fall meeting
Rick, J Hiltz, Robert, Paul, Peter and Mike and Miles
Leo showed the finished plate for the fall sale at the Hospital fund raiser.
We then started work on the large bowl and vase for the sign. We each took a turn doing the vase or bowl and got the basic shapes established. The plan is to continue to meet weekly to get everything ready.
Leo showed the finished plate for the fall sale at the Hospital fund raiser.
We then started work on the large bowl and vase for the sign. We each took a turn doing the vase or bowl and got the basic shapes established. The plan is to continue to meet weekly to get everything ready.
 |
| New Album 11-10-04 9:22 PM |
Subscribe to:
Posts (Atom)